Widget Rules
One of the most powerful features of QtPyVCP are the Widget Rules. Widget Rules are a flexible way of making widgets respond to changes in external data.
Rules can be used for things as simple as making a label display the current machine position, or as complicated as hiding, showing and rearranging widgets and layouts.
Each widget can have multiple rules applied to it, and each rule can make use of data from multiple sources.
Terms
Here are some definitions of terms that will be used on this page. They probably won’t make much sense at this point but don’t worry about that now. It will all come together after a few examples.
Rule: A rule defines how one aspect of the widget changes in response to external data. For example a rule might be used to set the text in a label, to enable or disable a button. A widget may have many rules applied to it.
Data Source: A data source is something the provides data channels. Examples
of a data source are status which provides machine status updates, and
tooltable which provides data on the tools in the tool table.
Data Channel: A data channel provides a single set of data which can be used
in the rules expression. Examples of data channels are status:tool_in_spindle
and tooltable:current_tool?comment.
Rules Expression: A rules expression is a python expression which you can use to manipulate the data from the data channels.*
Creating Rules
Rules are created and edited using a special Rules Editor dialog in QtDesigner.
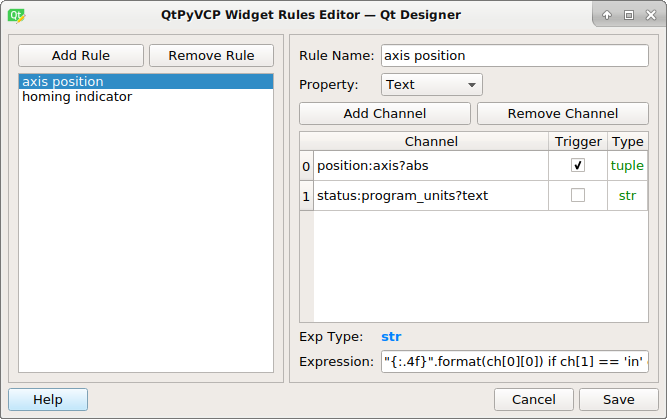
On the left side of the dialog is a list of all the rules applied to the widget. On the right side is where you edit the rules by selecting what aspect of the widget they affect, what data channels to source data from, and the expression which brings is all together.

Rules Editor
Opening the Editor
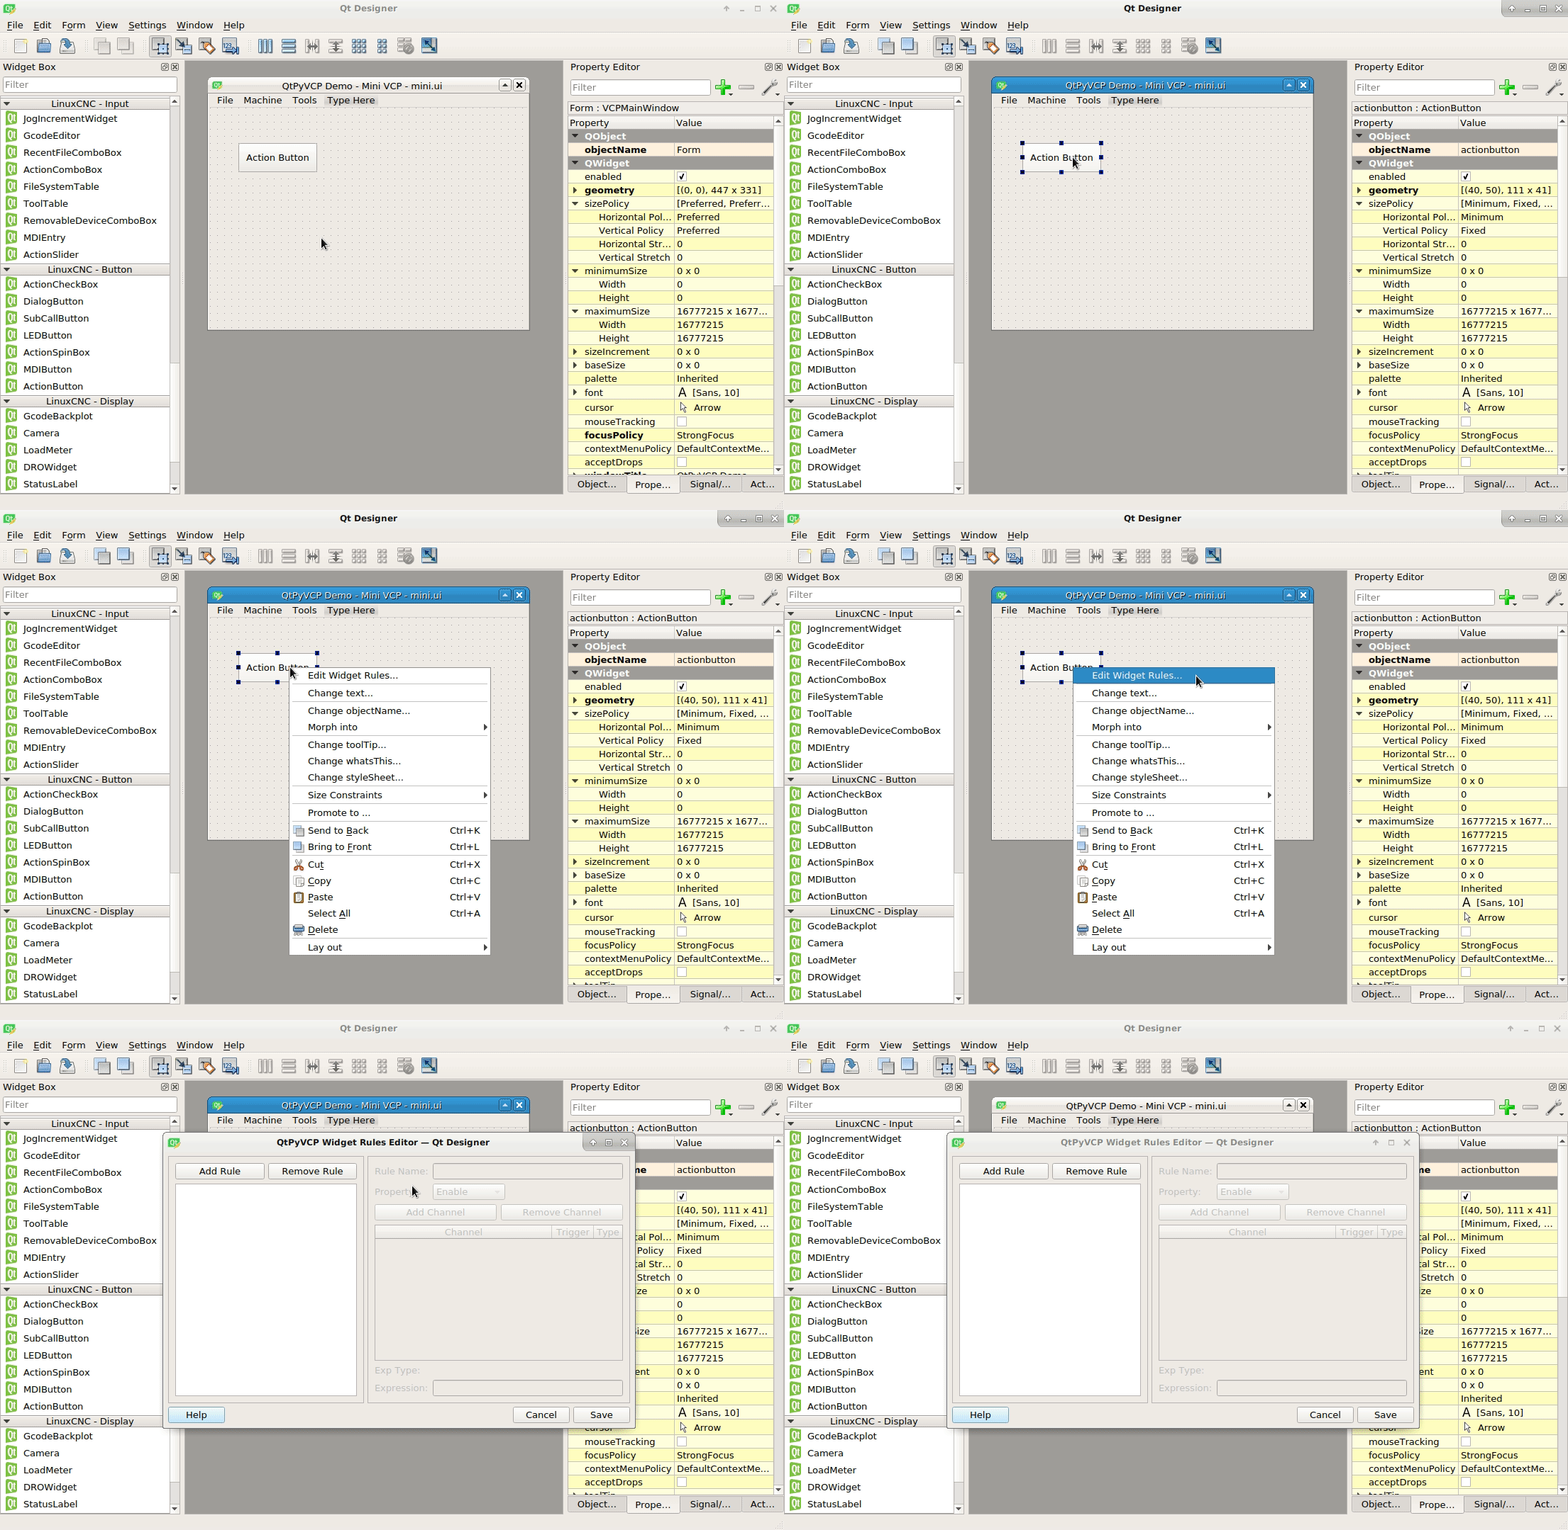
With a VCP open in designer, right-click on a widget and in the Task Menu select the Edit Widget Rules… option. You may also be able to double click on the widget to open the rules editor.
Here is a step-by-step on how to open the Rules Editor.

Opening the Rules Editor
Adding A New Rule
With the Rules Editor open, add a rule by clicking on the Add Rule button on the top left or delete a rule by clicking on the Remove Rule button.
- Set the Rule Name
The rule name can be anything you like, but it should be something meaningful and make it clear to others what the rule does.
- Select the Property
The property combo box will display a list of widget properties that the rule can control. Select the property you would like to have the rule change. Notice that that the blue Exp. Type value at the bottom of the window changes depending on the property you select. This indicate the type of value the Expression should return.
- Channels
Add at least one channel to be used to trigger the rule and provide a value for use in the expression. To do this click at the Add Channel button on top of the table and fill in the channel address. The channel address format is
datasource:channel_name?query. Type the first letter of the Data Plugin to get a list of channels for that plugin.Examples:
status:paused                       # bool, whether the machine is paused or not
status:joint[0].homed               # bool, whether joint No. 0 is homed
position:abs?string&axis=x          # string, current absolute position of the X axis
tootlable:current_tool              # dict, dictionary of current tool data
tootlable:current_tool?diameter     # float, query diameter of the currently loaded tool
tootlable:current_tool?comment      # string, query comment for the currently loaded tool
If a query is not explicitly given it will default to
?value. Example:status:pausedis equivalent tostatus:paused?value.The Trigger option defines if the expression will be evaluated or not when that channel’s value changes. At least one channel must be marked as a Trigger.
With the channel(s) added it is time to create the expression.
- Expression
To use data from the channels in the expression you used the special function
ch[chan_num], wherechan_numis the number that is shown in the left column of the channels list. For example,ch[0]in an expression will be replaced with that channels value when the expression is evaluated.When the user selects a property, the Expected Type label is updated with the data type the expression should return.
It is the user responsibility to cast the data properly and ensure that the proper data type (or equivalent) is the result of the evaluation. If you make a mistake a warning box will pop up when saving the rule giving you a chance to go back and fix it.
Examples
Set text in label
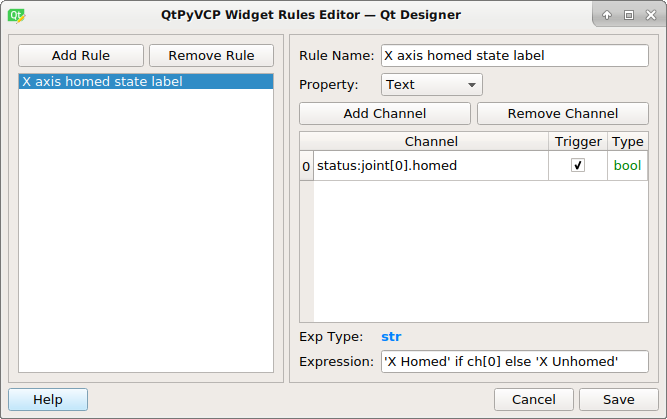
Here is a basic rule which will set the text in a label to “X Homed” if joint 0 is homed (ch[0] is True), or to “X Unhomed” if joint 0 is not homed (ch[0] is False). Channel 0 data type is bool which means it is either true or false. The expression reads like this set the label text to X Homed if channel 0 is true else set the text label to X Unhomed.

Rule to set label text according to homed status.
Style Class
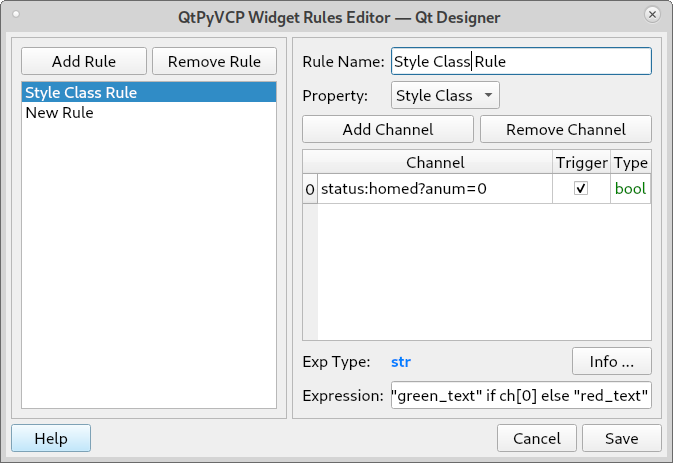
To use the Style Class create a style in the css file and use the rule to set or unset that style. The following is placed in the ui/style.css file.
StatusLabel[style='red_text']{
  color:red;
}

StatusLabel[style='green_text']{
  color:green;
}

Rule to set the text color based on the homed status of axis 0