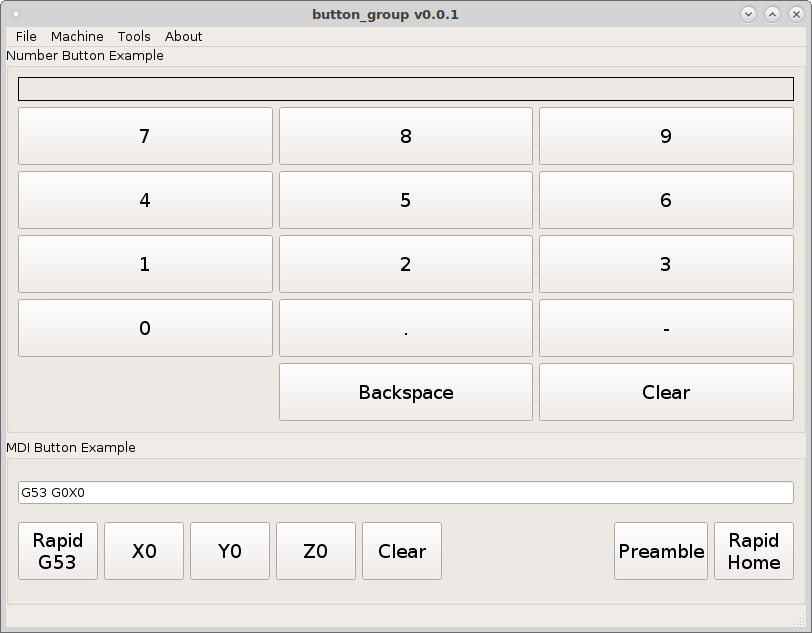
Button Groups
A Button Group is a very powerful and flexible way to have a touch screen keyboard. You add push buttons to the panel then select them all and add them to a button group. The button group will emit a signal any time a button is pressed.
Once you connect the button group to a function when a button is pressed it sends the button pressed to the function so every property is available to use. Then you can use the properties of the button like button.text() to get the text of the button.
For this tutorial I’ll clone a copy of the vcp template as shown in the VCP Template
page and name the VCP button_group and copy the
LinuxCNC Configuration Files so we can test the VCP as we go along.
Now open a terminal and edit the vcp with editvcp and select
~button_group/button_group/config.yml.
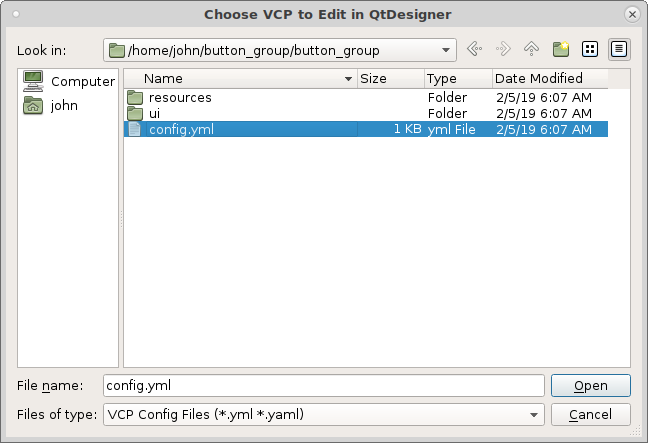
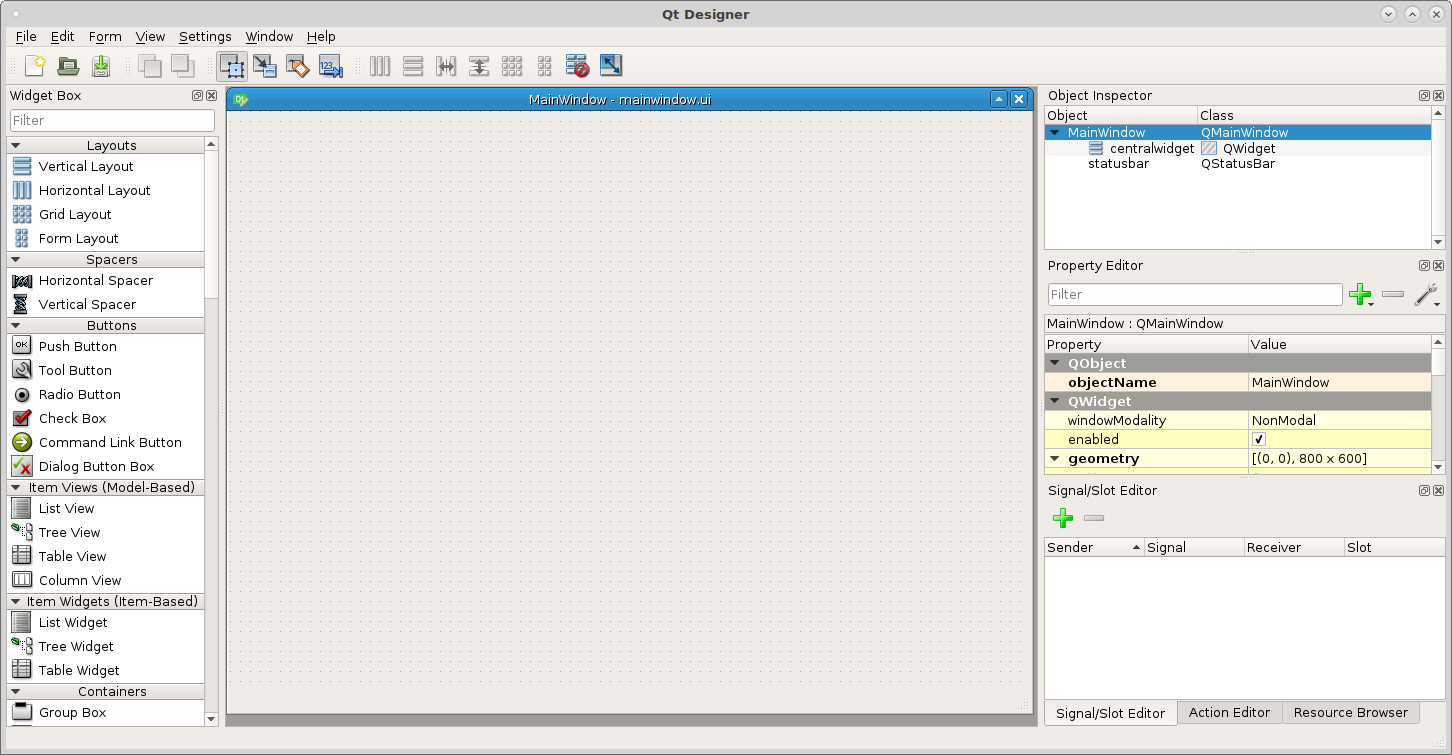
Now we have the blank template to work with.
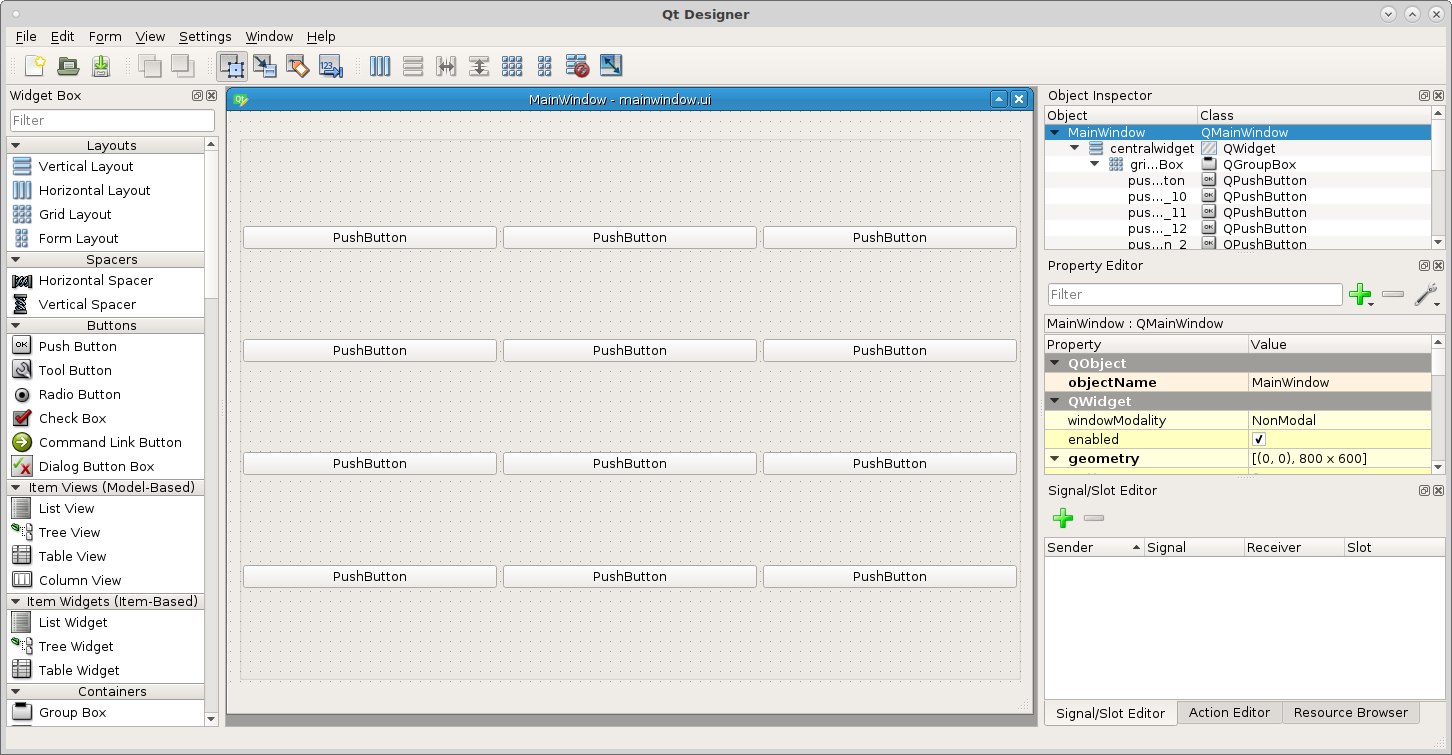
Lets start by adding some buttons to create a number keypad. First drag a Grid Layout into the main window and right click on it and morph it into a Group Box. Next drag some buttons into the group box like so.
This is a touch screen example so lets make the buttons big enough to touch. In the Main Window open the stylesheet and add the following style to set the minimum height and width and set the font size.
QPushButton {
min-height: 50px;
min-width: 50px;
font: 14pt "DejaVu Sans";
}
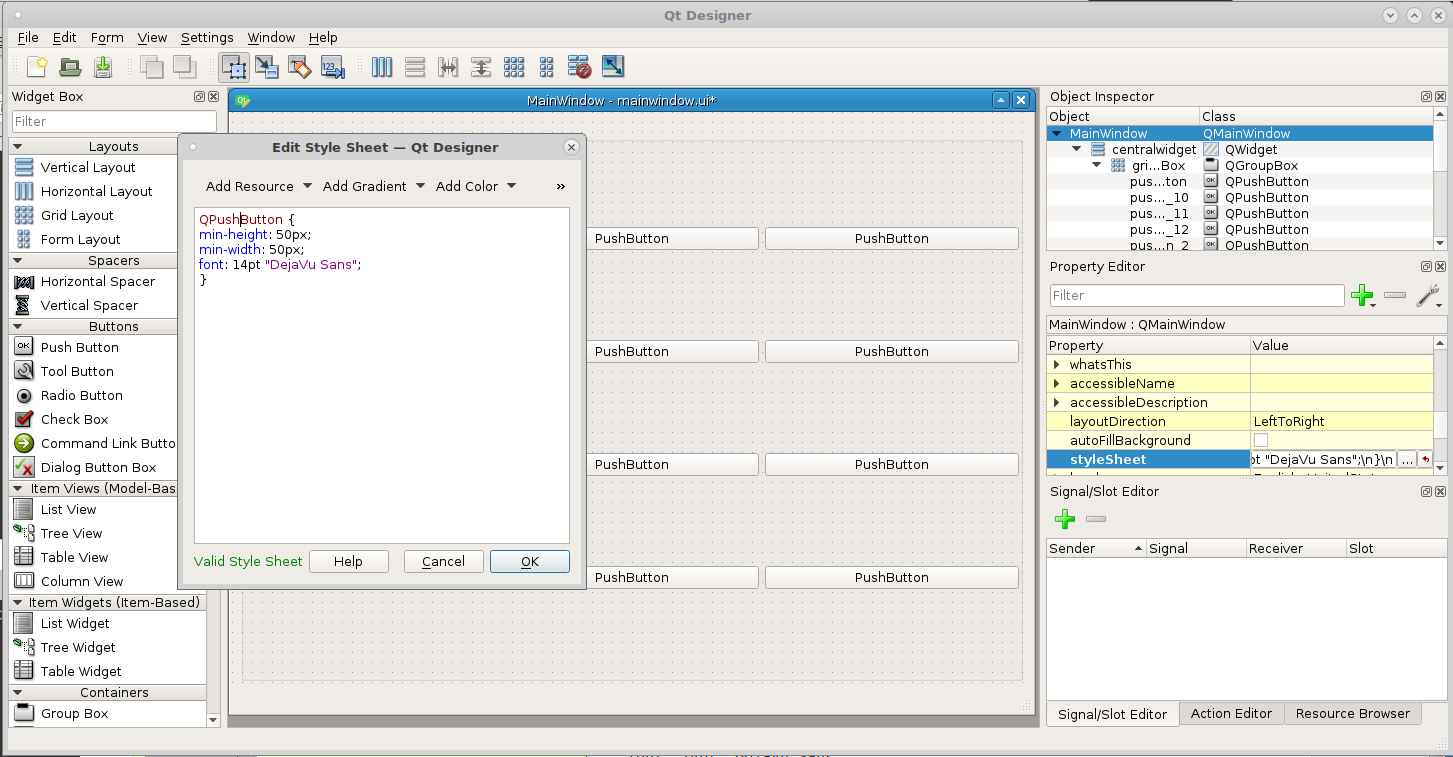
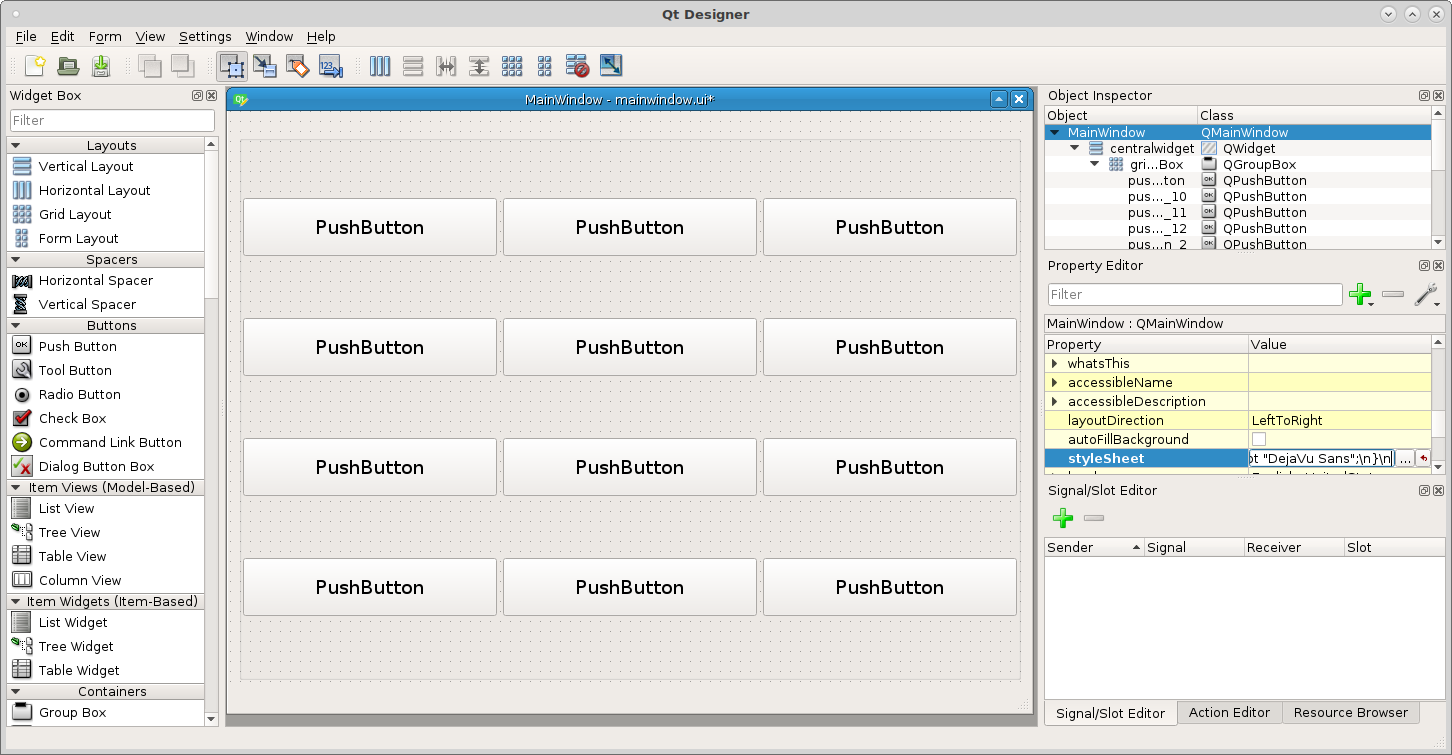
Now we can see the buttons are large enough to use with a touch screen.
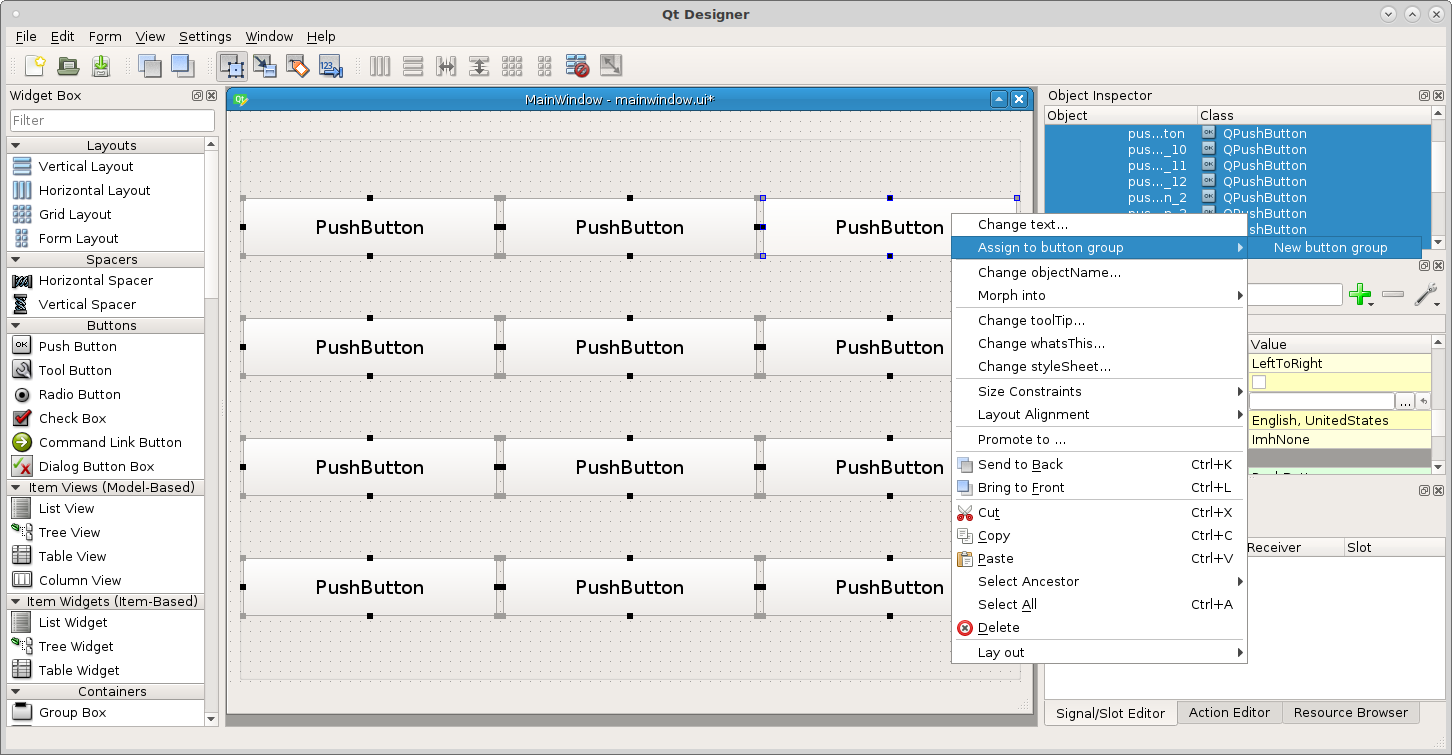
Next we need to add the buttons into a group Ctrl left click on each button to select it then right click on any button and select Assign to button group New button group
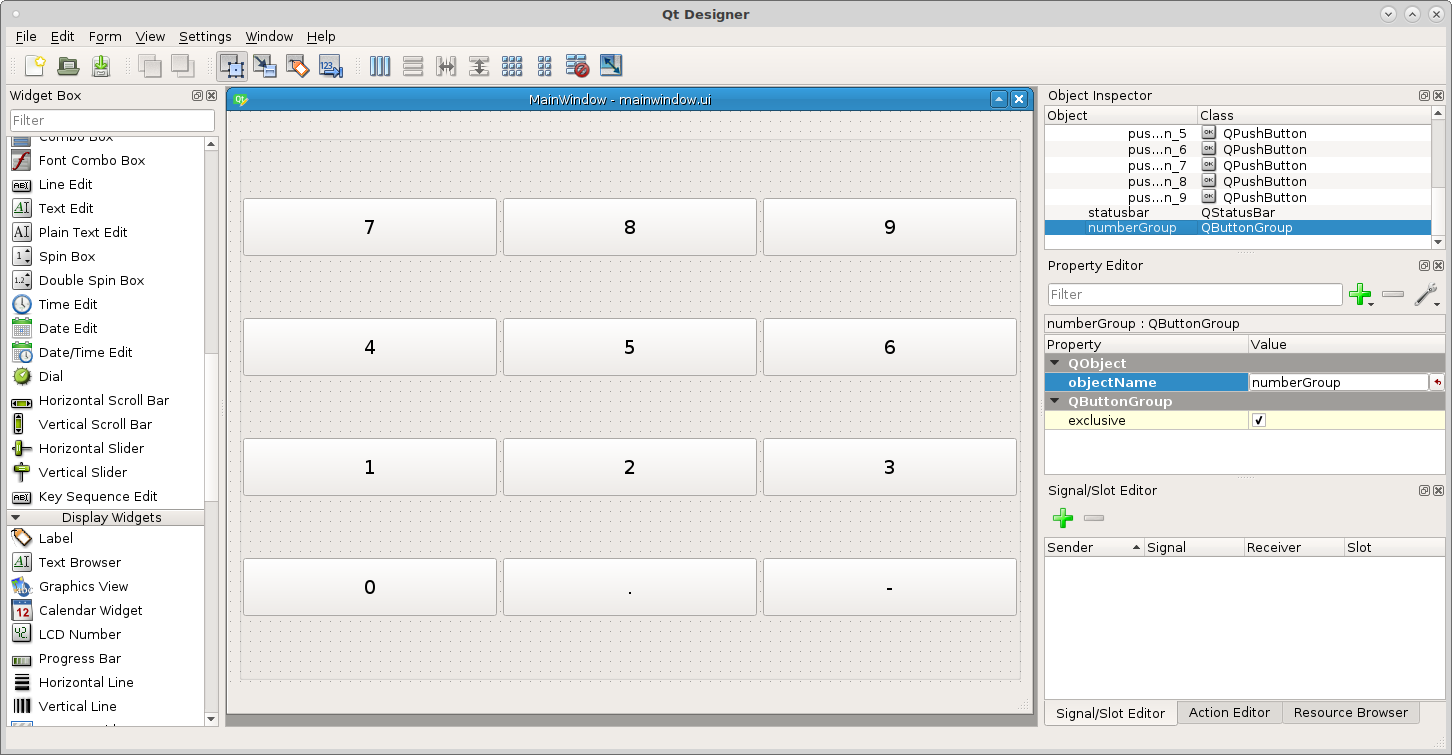
Change the objectName of the button group to numberGroup and change the text
of the buttons like this.
Now add a label and stretch it so it spans the width of the group box and change
the objectName to displayLabel. I added a box to the label and changed the
font to alignRight and the font size to 14.
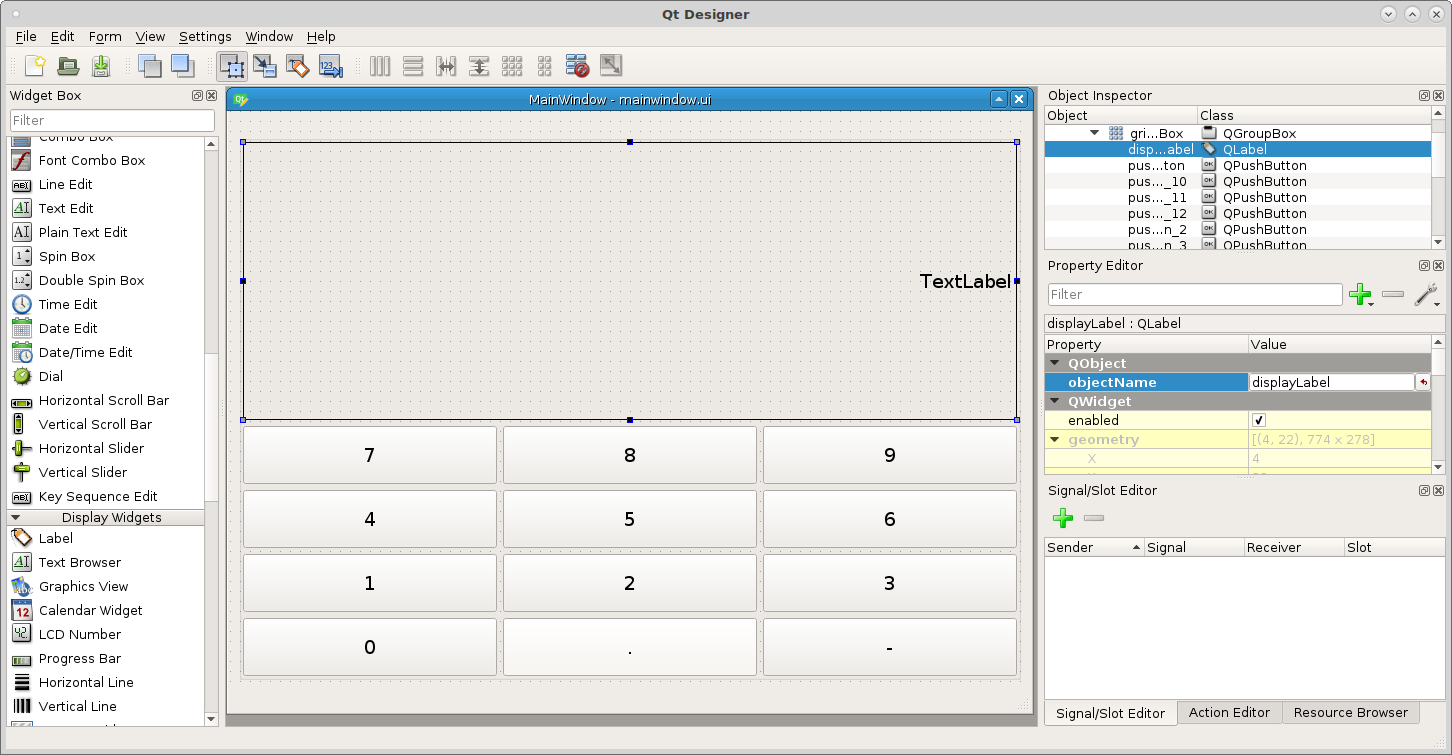
If you run the button group you can see the buttons but they won’t do anything. Open ~button_group/button_group/mainwindow.py and you will see the following.
from qtpyvcp.widgets.form_widgets.main_window import VCPMainWindow

# Setup logging
from qtpyvcp.utilities import logger
LOG = logger.getLogger('qtpyvcp.' + __name__)

class MyMainWindow(VCPMainWindow):
    """Main window class for the VCP."""
    def __init__(self, *args, **kwargs):
        super(MyMainWindow, self).__init__(*args, **kwargs)

    # add any custom methods here
Indentation in Python is strict so use spaces in this file so they remain the same. In the __init__ function we need to connect the button group to a function. We do this with a connect function. We connect the buttonClicked that is passed by the button group to the function.
The syntax is:
self.buttonGroupName.buttonClicked.connect(self.functionName)
So add the following to mainwindow.py in the __init__ function.
self.numberGroup.buttonClicked.connect(self.numberKeys)
We also need to create the function numberKeys and for now it will do nothing.
def numberKeys(self, button):
    pass
The file will look like this now.
from qtpyvcp.widgets.form_widgets.main_window import VCPMainWindow

# Setup logging
from qtpyvcp.utilities import logger
LOG = logger.getLogger('qtpyvcp.' + __name__)

class MyMainWindow(VCPMainWindow):
    """Main window class for the VCP."""
    def __init__(self, *args, **kwargs):
        super(MyMainWindow, self).__init__(*args, **kwargs)
        self.numberGroup.buttonClicked.connect(self.numberKeys)

    # add any custom methods here

    def numberKeys(self, button):
        pass
You can test run and it should load without any errors, if you get an error check for typo’s or an indentation problem.
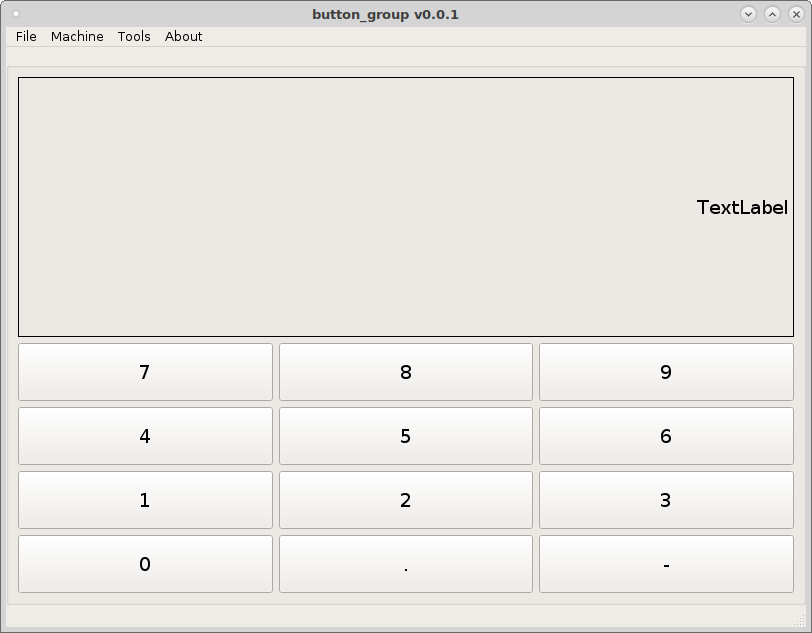
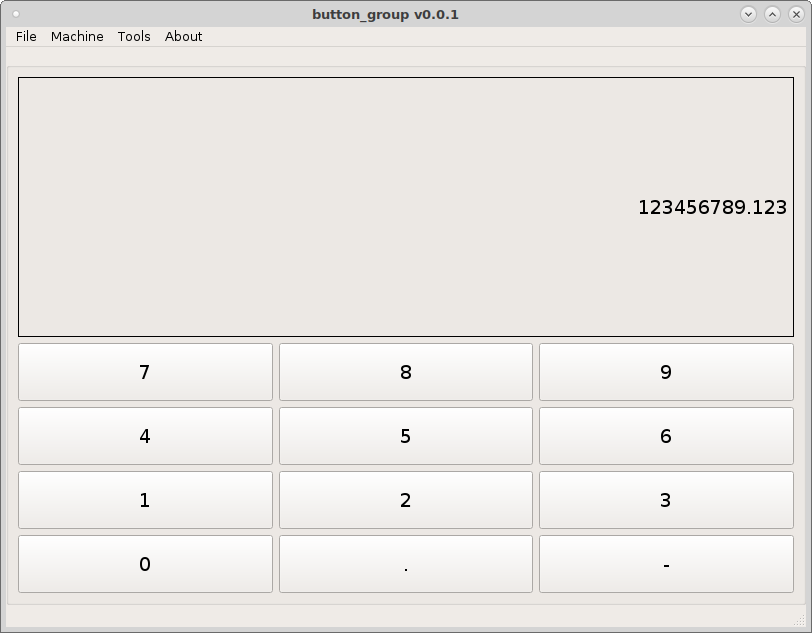
Delete the text from the displayLabel so it’s blank and add to the numberKeys function the following code.
def numberKeys(self, button):
    text = self.displayLabel.text() # copy the label text to the variable
    if len(text) > 0: # if there is something in the label
        text += button.text() # add the button text to the text variable
    else: # if the label is empty
        text = button.text() # assign the button text to the text variable
    self.displayLabel.setText(text) # set the text in label
Now when we run the VCP we can add the text from each button to the label.
Now for some correction keys add a couple of push buttons below the numbers and
name one Backspace and the other one Clear and change the objectNames to
backspaceButton and clearButton.
We will do the easy one first, add a new signal/slot and set it up like this:
Sender     clearButton
Signal     clicked()
Receiver   displayLabel
Slot       Clear()
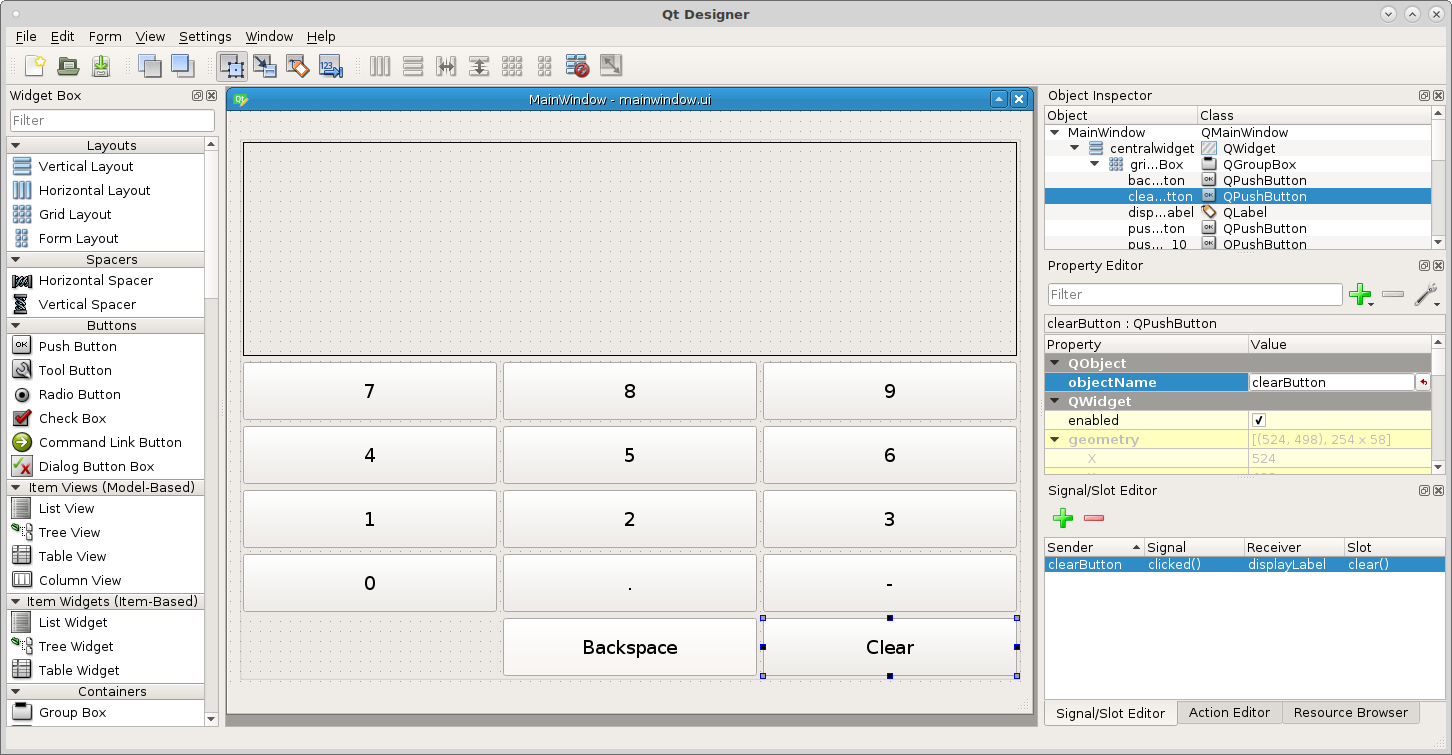
Now you can clear the entry so lets do the backspace button. Open up mainwindow.py and add a new connection. Notice that the button emits a clicked signal not a buttonClicked.
self.backspaceButton.clicked.connect(self.numberKeyBackspace)
Create the function and notice the [:-1] which removes the last character from the text.
def numberKeyBackspace(self):
    text = self.displayLabel.text()[:-1] # assign all but the last char to text
    self.displayLabel.setText(text)
And the mainwindow.py file looks like this now.
from qtpyvcp.widgets.form_widgets.main_window import VCPMainWindow

# Setup logging
from qtpyvcp.utilities import logger
LOG = logger.getLogger('qtpyvcp.' + __name__)

class MyMainWindow(VCPMainWindow):
    """Main window class for the VCP."""
    def __init__(self, *args, **kwargs):
        super(MyMainWindow, self).__init__(*args, **kwargs)
        self.numberGroup.buttonClicked.connect(self.numberKeys)
        self.backspaceButton.clicked.connect(self.numberKeyBackspace)

    # add any custom methods here

    def numberKeys(self, button):
        text = self.displayLabel.text() # copy the label text to the variable
        if len(text) > 0: # if there is something in the label
            text += button.text() # add the button text to the text variable
        else: # if the label is empty
            text = button.text() # assign the button text to the text variable
        self.displayLabel.setText(text) # set the text in label

    def numberKeyBackspace(self):
        text = self.displayLabel.text()[:-1] # assign all but the last char to text
        self.displayLabel.setText(text)
Now when you run the VCP you can put numbers in the label and remove or clear them. If the label was a mdiEntry we could issue the MDI command with a signal slot connection like the Clear() was used on the label.
Properties
If you need to send something longer like a preamble or a rapid to home G code to a mdiEntry having a button like G53 G0 X0 Y0 Z0 might take up too much space so for that we will use a Dynamic Property to our buttons.
Drag a Grid Layout below the number key group box and morph into a group box.
Add a mdiEntry and a couple of buttons. Name them Preamble and
Rapid\nHome. Select them and add them to a new button group and name the
button group mdiGroup.
Open up the mainwindow.py file and add a connection for the mdiGroup to the
mdiKeys function.
self.mdiGroup.buttonClicked.connect(self.mdiKeys)
Create the mdiKeys funtion with a pass for now.
def mdiKeys(self, button):
    pass
Lets start with the Preamble button and add two Dynamic Properties by clicking
on the green plus sign in the Property Editor and selecting String. Put
gcode as the Property Name. Add a second one as string with the property
name of action.
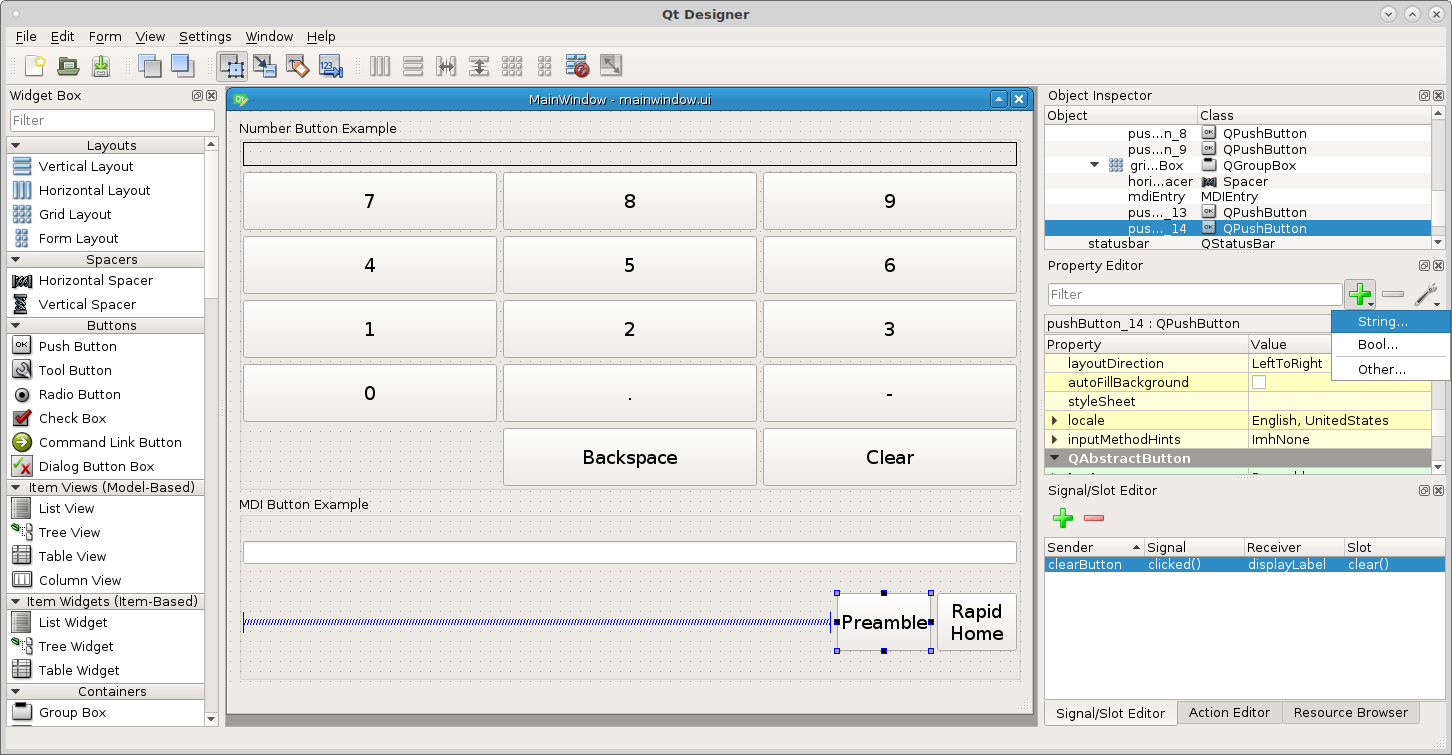
In the gcode dynamic property of the Preamble button put
G20 G17 G40 G49 G64 P0.005 G80 G90 G92.1 G94 and in the action dynamic
property put replace.
In the gcode dynamic property of the Rapid Home button put G53 G0 X0 Y0 Z0
and in the action dynamic property put replace.
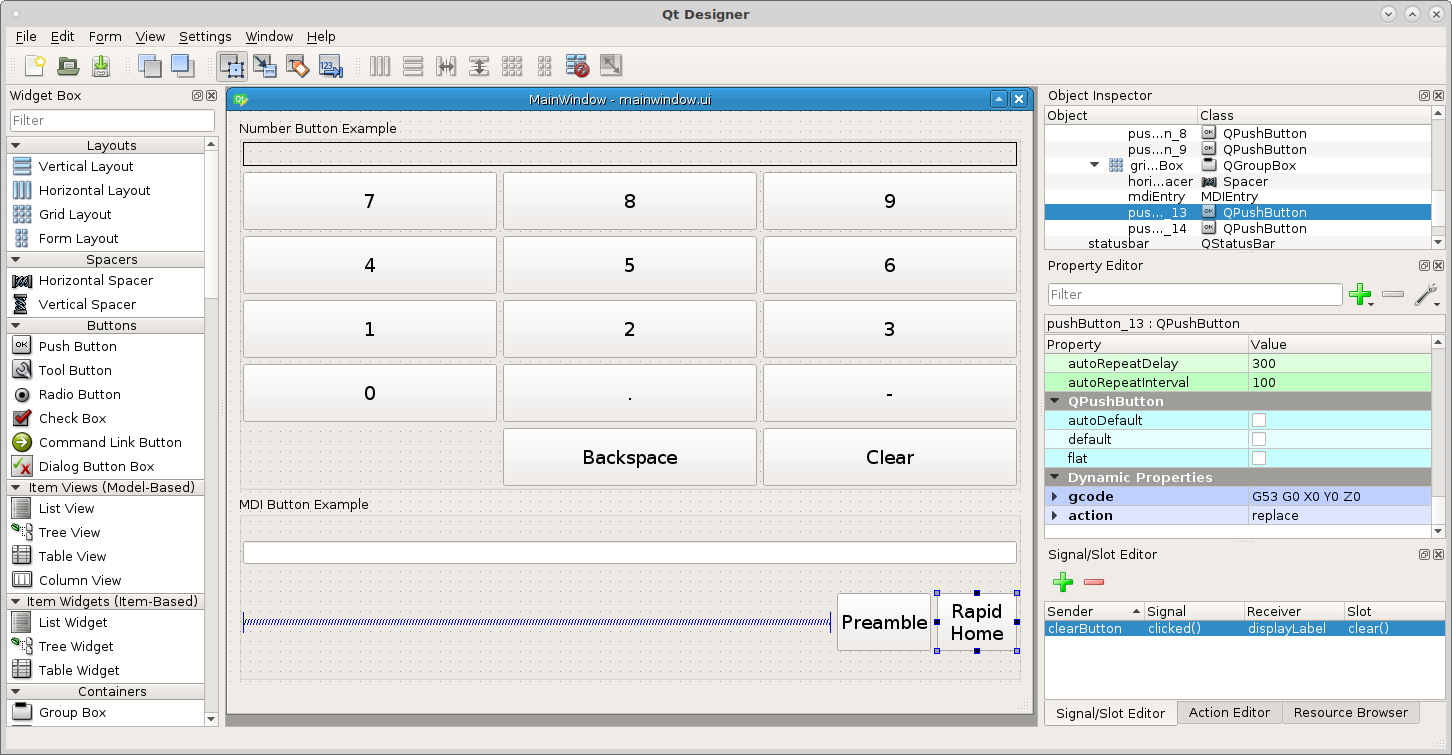
Now add the code for a button action of replace to the mdiKeys function
if (button.property('action')) == 'replace':
    self.mdiEntry.setText(button.property('gcode'))
So now the mainwindow.py file should look like this
from qtpyvcp.widgets.form_widgets.main_window import VCPMainWindow

# Setup logging
from qtpyvcp.utilities import logger
LOG = logger.getLogger('qtpyvcp.' + __name__)

class MyMainWindow(VCPMainWindow):
    """Main window class for the VCP."""
    def __init__(self, *args, **kwargs):
        super(MyMainWindow, self).__init__(*args, **kwargs)
        self.numberGroup.buttonClicked.connect(self.numberKeys)
        self.backspaceButton.clicked.connect(self.numberKeyBackspace)
        self.mdiGroup.buttonClicked.connect(self.mdiKeys)

    # add any custom methods here

    def numberKeys(self, button):
        text = self.displayLabel.text() # copy the label text to the variable
        if len(text) > 0: # if there is something in the label
            text += button.text() # add the button text to the text variable
        else: # if the label is empty
            text = button.text() # assign the button text to the text variable
        self.displayLabel.setText(text) # set the text in label

    def numberKeyBackspace(self):
        text = self.displayLabel.text()[:-1] # assign all but the last char to text
        self.displayLabel.setText(text)

    def mdiKeys(self, button):
        if (button.property('action')) == 'replace':
            self.mdiEntry.setText(button.property('gcode'))
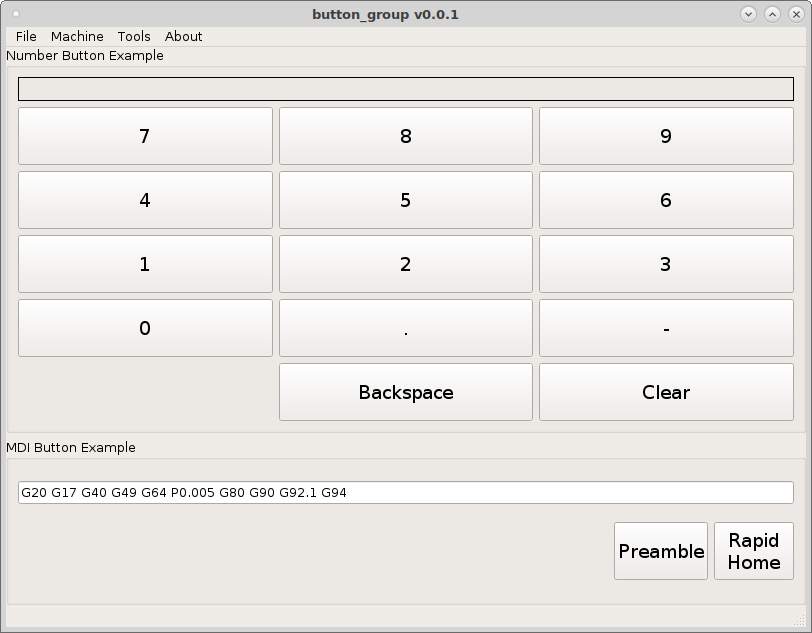
Now when we run the VCP and click on the two buttons you can see how the text in the gcode dynamic property is placed into the mdiEntry.
To show how the action Dynamic Property can work lets add some more buttons. Select them all and add two Dynamic Properties like before but to all of them at once.
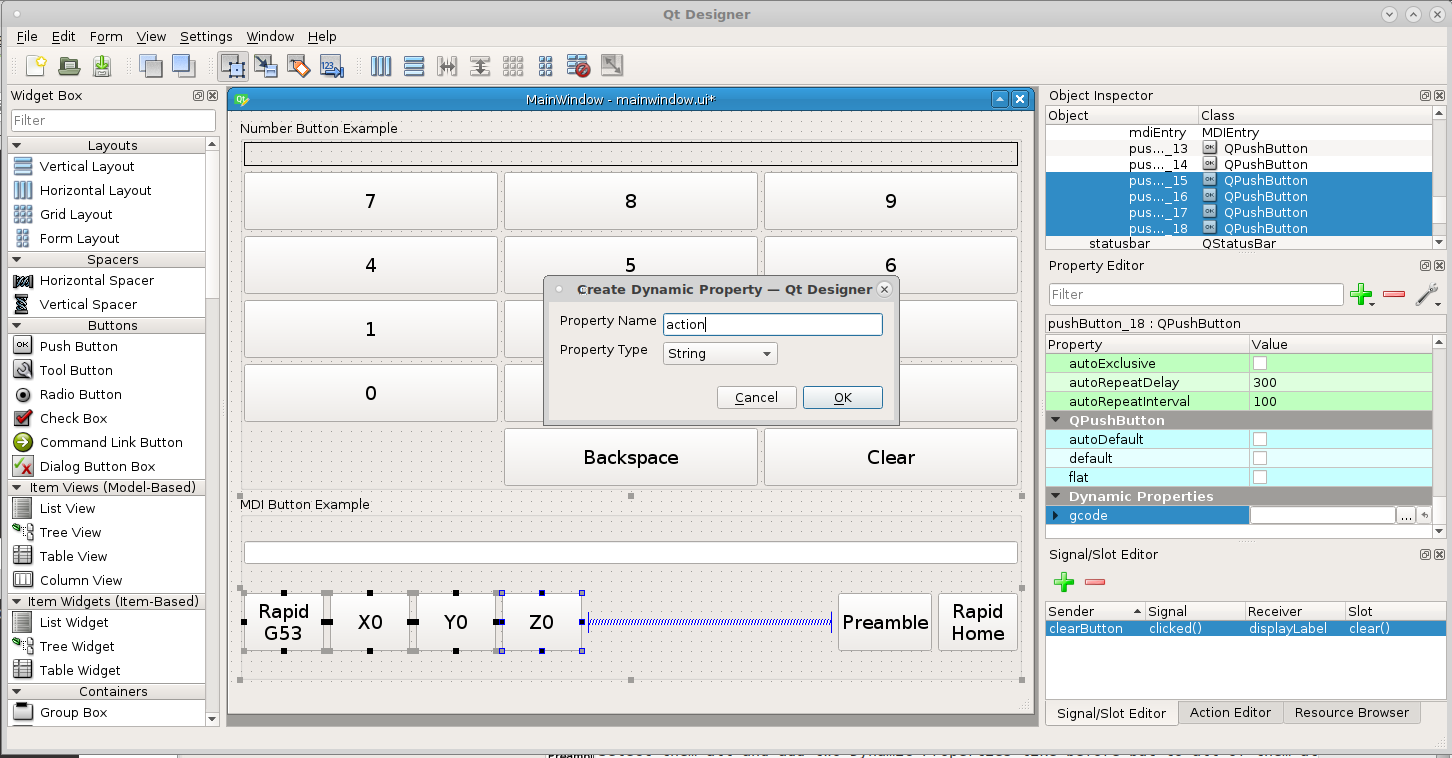
With all 4 buttons still selected add append to the action dynamic property
and right click on one button and assign them to the mdiGroup. Now select each
button one at a time and add the following to the gcode dynamic property.
Rapid G53       G53 G0
X0              X0
Y0              Y0
Z0              Z0
Now add the following to the mdiKeys function in the mainwindow.py file.
if (button.property('action')) == 'append':
    text = self.mdiEntry.text()
    text += button.property('gcode')
    self.mdiEntry.setText(text)
Now add a Clear button and add a signal linking it to the mdiEntry Clear().
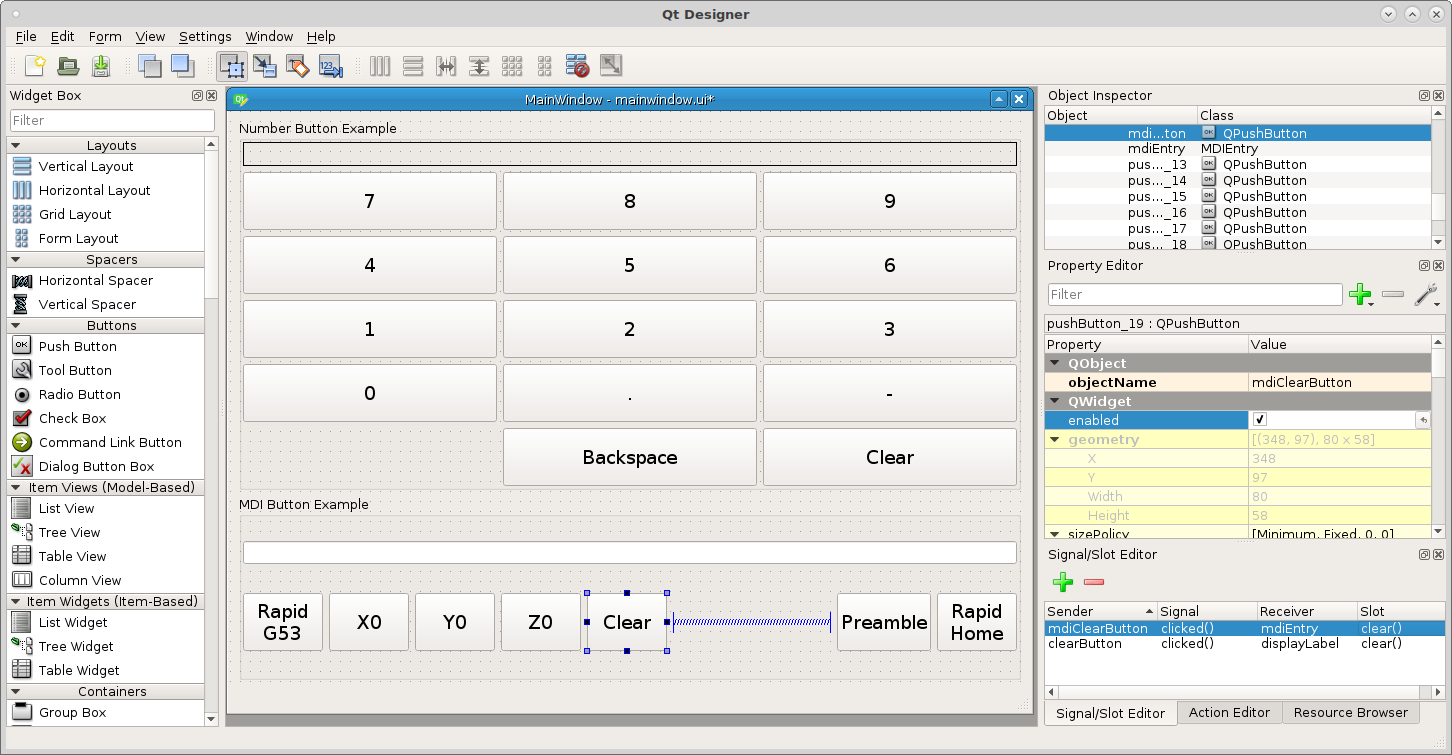
When we run the example we can see the gcode added to or replaced in the MDI entry. If we had a fully running example a Send button connected to the mdiEntry submit() slot would send the G code to LinuxCNC.
